
 Synchronisierung der ModulleistungWenn ein Modul der LP- oder Schildgruppe ausgerüstet ist, erhöhen sich der Verstärkungsfaktor der Basis-Fähigkeitsstärke und der Fähigkeitsstärke-Modifikator jeweils um 6,6 %[+].Steigerung der Basis-Fertigkeitsstärke +6.6%[+] · Fertigkeitsstärke-Modifikator +6.6%[+]
 Schriftlicher LeitfadenAktualisierung 1.4.5Öffentlich2 KommentareStreubombeMIT AHNENMODULGEGNERGRUPPEN
Esiemo, Cluster Bomb : Mobbing / Onslaught Build by Khei_Khan
Ultimate-Esiemo - von KHEI_KHAN
- Erstellt
- Zuletzt aktualisiert

EnergieaktivatorAktiv
Kapazität75 / 85
2.063Aufrufe
4Likes
Letzte Build-Änderungen
Zielaktivitäten
- Hinzugefügt: Überfall
- Entfernt: Assaut
- Entfernt: Schiffszugang
Ausgelegt für
ÜberfallPrimär
AnsturmStadium 5Kopfgeldoperation
KopfgeldoperationenKopfgeldoperation
KopfgeldoperationenLeeren-Erosionssäuberung
Leeren-ErosionssäuberungLeeren-Erosionssäuberung
Leeren-Erosionssäuberung

Sprengstoffästhetik
Auslöser
2

Streubombe
Stufe 11
8

Feuer-Verstärkung
Treffer
Stufe 11
8

Stärke-Erhöhung
Kampf
Stufe 11
8

Fertigkeitenerhöhung
Stufe 11
6

Flinke Finger
Stufe 8
8

Entschlossenheit des Sprengstoff-Experten
Vorfahren
15

Luftmanöver
Stufe 11
3

Überwältigender Schild
Letztes Mittel
Stufe 11
8

Schildresonanz
Schild
Stufe 11
8

Lebensresonanz
LP
Stufe 11
8

MP-Umwandlung
Kontrolle
Stufe 11
8

Erhöhte LP
Stufe 11
Waffen-Builds
Reaktor
Externe Komponenten
Gefährte
Wähle einen Nachfahren, um sein Arche-Tuning-Board anzuzeigen.
Fähigkeit
Waffe
Erholung
Überleben
Saison
Aktivierungsdetails
 Schildpartikel-RekonfigurationBei einem Treffer: VTD +42,8 % und erhöhter maximaler Schildwert für 10 s. Abklingzeit: 35 s.VER +42.8% · Max. Schild +40.5%
 Notfall-PanzerungsaktivierungBei 50 % LP oder weniger wird Notfall-Panzerungsaktivierung gewährt: Modifikator für eingehenden Schaden -12 %[+] für 10 s. Abklingzeit: 30 s.Modifikator des erhaltenen Schadens -12%[+]
Esiemo, Cluster Bomb : Mobbing / Onslaught Build by Khei_Khan
Caractéristiques du Build / Build Features
- Les Dégâts infligés augmentent suivant le Bouclier Max d'Esiemo / Damage dealt increases based on Esiemo's Maximum Shield.
- Esiemo a besoin d'avoir 30 000 de Bouclier pour infliger le maximum de dégâts possibles / Esiemo needs 30,000 Shield to deal the maximum possible damage.
- Ce Build n'a aucun moyen direct de restaurer du Bouclier Max / This build has no direct way to restore Maximum Shield.
- Pour restaurer le Bouclier on utilise le Bouclier de Bio-synchronisation, le Set de Détermination Dénaturée et le Renforcement d'Inversion / To restore Shield, use Bio-Sync Shield, the Distorted Determination Set, and Inversion Reinforcement.
- Une Arme de Mêlée n'est pas nécessaire pour ce Build / A melee weapon is not required for this build.
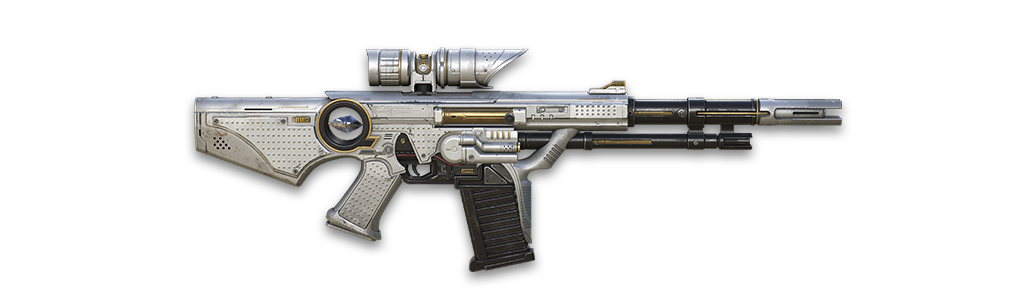
- Le Jardin Secret est l'Arme Principale à utiliser dans ce Build / Secret Garden is the primary weapon to use in this build.
Rotation des Compétences / Skill Rotation
- La Compétence 1 permet de poser les bombes au sol rapidement et en continu pour piéger une large zone / Skill 1 allows you to quickly and continuously place bombs on the ground to trap a large area.
- La Compétence 3 permet de poser les mines qui vont exploser si un ennemi bouge dans la zone / Skill 3 allows you to deploy mines that will explode when an enemy moves within their area.
- La Compétence 4 permet d'actionner le Module Déclencheur pour faire une explosion massive / Skill 4 activates the Detonator Module, causing a massive explosion.
- La Compétence 2 permet de déclencher les bombes de la Compétence 1 ainsi que les mines de la Compétence 3 / Skill 2 allows you to detonate both the bombs placed by Skill 1 and the mines deployed by Skill 3.
Attention / Warning
- Contrairement au Bombardier Totalement Fou, vous ne pouvez pas augmenter votre Bouclier donc il est impératif d'avoir 30 000 de Bouclier et pour ça faut obligatoirement un Ancestral spécifique possédant du Bouclier ainsi que du Délai vu qu'on passe notre temps à spammer la Compétence 1 / Unlike the Rampaging Mad Bomber, you cannot increase your Shield, so it is essential to have 30,000 Shield. To achieve this, you absolutely need a specific Ancestor with Shield and Cooldown Reduction stats, since you'll be constantly spamming Skill 1.
Ancestral / Ancestor
- Boost Tech / Tech Boost Ratio
- Boost Feu / Fire Boost Ratio
- Bouclier
Cœur Volcanique / Volcanique Heart
L'Arme de prédiléction de Esiemo pour booster ses Compétences Feu, le but est de drop une version proche de 400 en Qualité et d'avoir le maximum de points dans l'Amplification des Compétences Feu / Esiemo's preferred weapon for boosting her Fire Skills. The goal is to get a version with a Quality rating close to 400 and as many points as possible in Fire Skill Amplification.
Concernant les Rolls pour plus tard / For the rolls later on :
- Taux d'Amplification des Compétences Feu 15% / Fire Skill Amplification Rate: 15%
- Taux d'Amplification des Compétences Feu 7% / Fire Skill Amplification Rate: 7%
Gameplay du Build / Build Gameplay
Hésitez pas à poster un commentaire sur le Build si vous avez besoin de plus d'explications / Feel free to leave a comment on the build if you need any further explanations or have any questions.

Merci

khei_khanBuild-Ersteller
De rien ^^
Esiemo, Cluster Bomb : Mobbing / Onslaught Build by Khei_Khan
Caractéristiques du Build / Build Features
- Les Dégâts infligés augmentent suivant le Bouclier Max d'Esiemo / Damage dealt increases based on Esiemo's Maximum Shield.
- Esiemo a besoin d'avoir 30 000 de Bouclier pour infliger le maximum de dégâts possibles / Esiemo needs 30,000 Shield to deal the maximum possible damage.
- Ce Build n'a aucun moyen direct de restaurer du Bouclier Max / This build has no direct way to restore Maximum Shield.
- Pour restaurer le Bouclier on utilise le Bouclier de Bio-synchronisation, le Set de Détermination Dénaturée et le Renforcement d'Inversion / To restore Shield, use Bio-Sync Shield, the Distorted Determination Set, and Inversion Reinforcement.
- Une Arme de Mêlée n'est pas nécessaire pour ce Build / A melee weapon is not required for this build.
- Le Jardin Secret est l'Arme Principale à utiliser dans ce Build / Secret Garden is the primary weapon to use in this build.
Rotation des Compétences / Skill Rotation
- La Compétence 1 permet de poser les bombes au sol rapidement et en continu pour piéger une large zone / Skill 1 allows you to quickly and continuously place bombs on the ground to trap a large area.
- La Compétence 3 permet de poser les mines qui vont exploser si un ennemi bouge dans la zone / Skill 3 allows you to deploy mines that will explode when an enemy moves within their area.
- La Compétence 4 permet d'actionner le Module Déclencheur pour faire une explosion massive / Skill 4 activates the Detonator Module, causing a massive explosion.
- La Compétence 2 permet de déclencher les bombes de la Compétence 1 ainsi que les mines de la Compétence 3 / Skill 2 allows you to detonate both the bombs placed by Skill 1 and the mines deployed by Skill 3.
Attention / Warning
- Contrairement au Bombardier Totalement Fou, vous ne pouvez pas augmenter votre Bouclier donc il est impératif d'avoir 30 000 de Bouclier et pour ça faut obligatoirement un Ancestral spécifique possédant du Bouclier ainsi que du Délai vu qu'on passe notre temps à spammer la Compétence 1 / Unlike the Rampaging Mad Bomber, you cannot increase your Shield, so it is essential to have 30,000 Shield. To achieve this, you absolutely need a specific Ancestor with Shield and Cooldown Reduction stats, since you'll be constantly spamming Skill 1.
Ancestral / Ancestor
- Boost Tech / Tech Boost Ratio
- Boost Feu / Fire Boost Ratio
- Bouclier
Cœur Volcanique / Volcanique Heart
L'Arme de prédiléction de Esiemo pour booster ses Compétences Feu, le but est de drop une version proche de 400 en Qualité et d'avoir le maximum de points dans l'Amplification des Compétences Feu / Esiemo's preferred weapon for boosting her Fire Skills. The goal is to get a version with a Quality rating close to 400 and as many points as possible in Fire Skill Amplification.
Concernant les Rolls pour plus tard / For the rolls later on :
- Taux d'Amplification des Compétences Feu 15% / Fire Skill Amplification Rate: 15%
- Taux d'Amplification des Compétences Feu 7% / Fire Skill Amplification Rate: 7%
Gameplay du Build / Build Gameplay
Hésitez pas à poster un commentaire sur le Build si vous avez besoin de plus d'explications / Feel free to leave a comment on the build if you need any further explanations or have any questions.
Merci
khei_khanBuild-Ersteller
De rien ^^